
First- Monster Wreath
I bought one large adjustable embroidery hoop at my local craft store(on sale for under a dollar), blue feathered boa, large googlie eyes, and some superglue.

I took the boa and glued it as I wrapped it around the ring. Then glued the eyes all over it...ta da!!

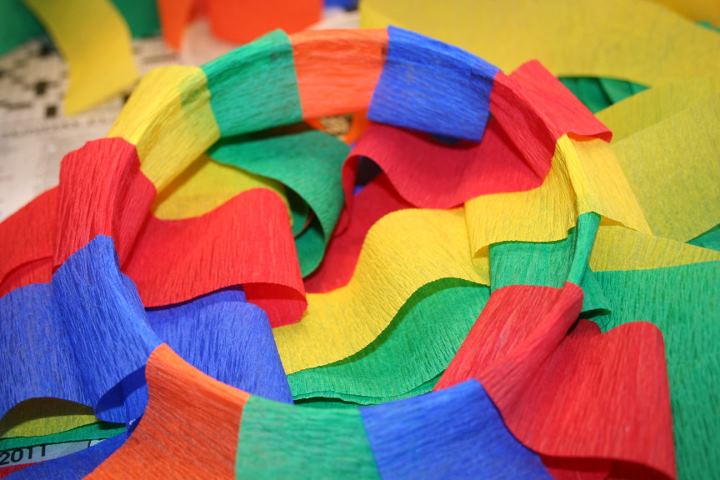
Second- Paper Streamer windsocks
This involved 4 adjustable embroidery hoop(once again on sale cheap!). I used 1 large and 3 medium. Our party colors were bright primary colors so I got yellow, green, red, blue, and orange streamers. I painted the outer hoop black, cut about 2 1/2 foot strips of streamer, and then glued them around the inner ring. Once everything was dry I put them back together and added my own touch of 2 big googlie eyes.


Third- Monster Bean Bag Toss
I was very excited about this one. Not only did it add to the decor but it also gave the kids a game to play. I really thought over what material I would use to make it. Wood seemed like the best idea, but I had no way to cut the mouth out unless I had a family member do it(which was offered). Me being the person who likes to do everything decided on thick foam poster board. I figured it was sturdy enough, very portable, cheaper, and less hassle. I bought 2 pieces and painted one black. I drew my monster on the other one and then painted. After it was painted I cut the mouth out and connected the 2 boards. To make sure it stayed upright when bags were thrown at it I used 2 pieces of foam board on the sides. For the bean bags I called my mom(who is making fabric flags) and asked if she had enough fabric to make a few small bean bags....she did! I had her make them small mainly because most of the kids would be 3 and under and I wanted to make sure they would easily go into the monsters mouth.


Fourth- Fabric Flags
We decided on fabric flags using our color scheme to help jazz the yard/house up(due to lots of rain the party ended up being indoors only).....Great idea BUT...I can NOT sew, nor do I own a sewing machine. Luckily my mom loves to sew and unluckily had a broken bone and was stuck at home for several weeks. She was more than happy to waste her days away sewing the many flags we requested. We hung them up with just some ribbon.

Fifth- Tissue Paper Balls
Scott saw this idea in a magazine and thought it would add some color and a fun shape to the decor. we looked online and found direction on how to make them and boom they were done!

I love ETSY and did a lot of browsing trying to find the prefect things for Max's party. I ran across Tea Party Designs and fell in love with her monster stuff! It is even cute in person!! Thanks so much!!


Seventh- Monster Cutout
I saw this monster hanging from the window of The Children's Place. I called the store and spoke to the manager and asked if I could have 1 or 2 of the signs are their sale was over, unfortunately she said they reused the signs so she couldn't get rid of them. A week or so later we got their sale paper in the mail and it had that cute monster on it. My husband being a school teacher has access to a over head projector so he put the monster on it, blew the size up, and traced it onto a poster board. I then painted it. We were going to hang outside but due to the rain he ended up indoors.

Eigth- Bday Invite
Once again while scouring ETSY I found Max's bday card from Treasured Moments. She quickly customized it and emailed me the JPEG file. I took the file to Kinko's and got it printed. Simple and easy!
 Ninth- Bday Clothing

I had purchased a few things from Studio MCA Designs off of ETSY and became a fan of theirs on Facebook. They did a contest for a personalized birthday shirt. I entered and WON!! So after a few email's I got Max's shirt in the mail! It was perfect! Thanks! I found Max's birthday hat also on ETSY from SAHM Doc Crafting. After getting it in the mail I realized I could have made it, but heck this was easier! We used his hat for his 1 year pics but forgot to put it on him at the party. Scott and I both wanted a monster shirt but buying one was going to be quite expensive so I found a iron on kit at Hobby Lobby and we made our own!


Tenth- Number 1
I got a plain number 1 at hobby lobby and painted it with our party colors, not only for decor but also to use in Max's 1 year pics. I think it turned out cute :)


This was super easy and I thought a fun touch. I glued googlie eyes to each of the cups.


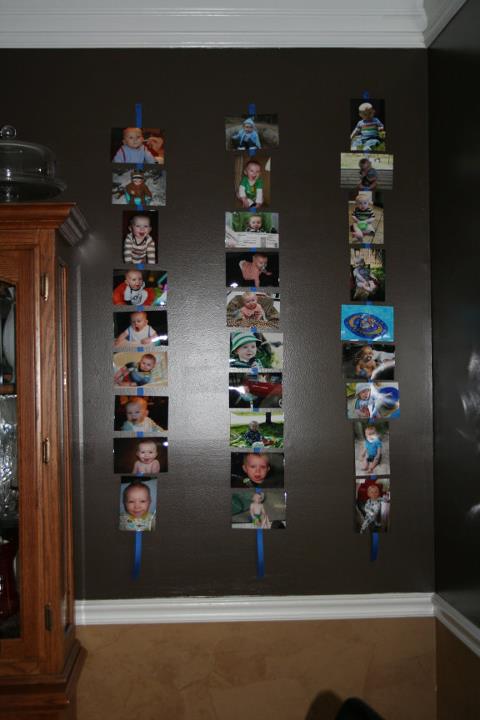
Twelfth- Picture's
I decided last minute to print a bunch of pictures of Max throughout the year and hang them on ribbon.

For the kids coming to the party I got on oriental trading and found some super cute stuff. I ordered the monster masks. They were great but I decided to pre-make them because little ones and glue didn't sound like a good idea. Good thing I did pre-make them b/c the glue took forever to dry....I even was able to get my co-workers to help :)


I also ordered monster treat bags. Now the bags sucked! They were folded and creased and basically un-usable. I ended up throwing them away and getting colored paper bags from target. I did keep the monster faces and glued them on the bags(a special shout out to little miss Lizzy who helped make the monsters while on summer break).


Some of the goodies that were in the bags included beach balls and rubber "duckies". I also ordered monster suckers and stuffed monsters that I used as decoration but also had the kids take them home too. There was also a candy setup, which will be in the next post.
Love everything about this! Please let me know when you post more pictures!
ReplyDelete- Melody (Tea Party Designs)